*This post contains sponsored content. Though we were compensated with product, all ideas and opinions are 100% our own! We chose to be Brand Reps for CeCe Caldwell because we love her products!*
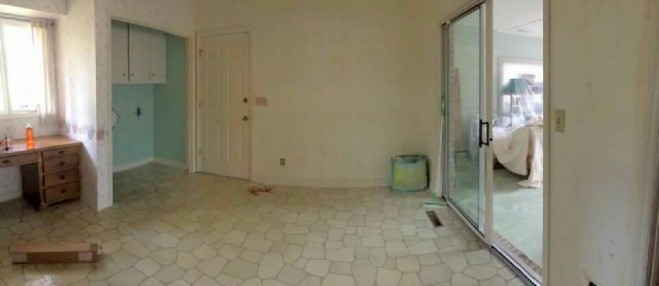
My husband (C) and I (Meg) have slowly been making over a 1980’s custom home. This home was built when appliances were smaller making the cabinets and closets that house them equally small. My “laundry closet” couldn’t fit our front load washer and dryer so we removed the doors and lived with it like that for several months. One month before my husband was heading home from deployment and a week after having unexpected surgery (I’m a special kind of special) a crew came in and built a laundry room for me. I talked over how to work with the space with a dear friend and she had the idea of a breakfast nook with a built in bench. I owe the awesomeness of this lay out to my friend Maegan. Good thinkin’, girl.
Here’s some quick pics of the before, framing, and build completion:
Tile was laid, doors put in, and I painted a few coats of primer and Sherwin Williams Alabaster for a clean slate. When C came home from deployment, the first thing he started working on was building the eat-in bench.
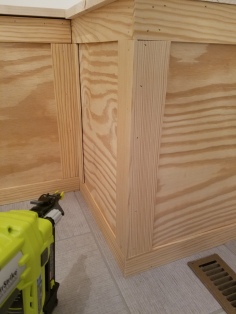
This is how that went (and all credit to C on this. I drew him pictures, told him what was in my head, and he went to work).
The back portion of the bench has a liftable seat for hidden storage. Can I get a Hallelujah!?
Once the structural part was done it was my turn.
I grabbed my tub of spackling to fill nail holes along the base and stainable wood filler to fill knots and holes in the top of the bench.
Originally I wanted to frame out the edges with very simple lattice molding. Like in most things, once I got started I changed my mind. Like many people, I appreciate ship lap. I think original, authentic shiplap is prrrrrreeeeetty damn awesome. BUT, I personally struggle with faux shiplap. In small doses, I think it is pretty amazing, but all over … it’s not for me (unless it’s original to the home). It’s especially not for me when it doesn’t match the overall style of the house. But again, I love the idea of it. I had thought about adding it to the walls of this nook but it just wouldn’t work with the look. The style is too different from what the rest of the house screams and then the ah-ha moment came.

Fake it in small spaces.
So I did just that.
I asked my assistant to measure out the proper length … and then I might have measured again just to be sure.
We purchased eight 8′ length pieces of lattice molding, grabbed a bunch of pennies, and charged up my nail gun.
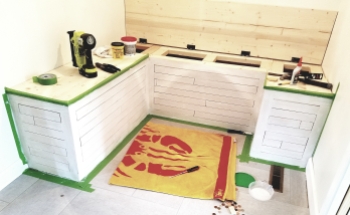
I had already framed out the edges before having my ah-ha moment. It would have been easy to remove them but I liked having everything framed out a bit. We measured the inside length of each section and then staggered different lengths for boards.

Once it was all up, I filled some nail holes but not all (to keep a random feel), sanded lightly, and then put on a quick and thick layer of primer.
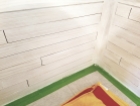
After the layer of primer, I pulled out my go-to CeCe Caldwell “Simply White” and added a quick (but thicker) layer over the primed boards.
After the CeCe Caldwell layer had dried, I went back over and randomly sanded the edges.

Next was the bench seat. I wanted a stained finish but staining anything indoors – especially during the summer! – is never fun. Since CeCe Caldwell Stains and Finishes are made from natural ingredients, using them indoors is crazy simple.
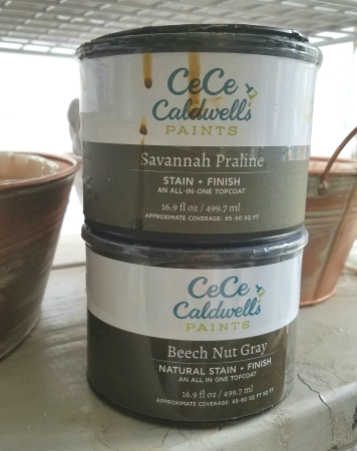
I was trying to decide between my two favorites: Savannah Praline and Beech Nut Gray.
Savannah Praline has a beautiful, rich honey tone and Beech Nut Gray is a stunning worn, brownish gray.
I had decided on Beech Nut. I pulled that awesome brown, plastic pint over, dipped my brush in, did my first stroke, and realized I had grabbed Savannah Praline.
Y’all.
I told you I was a special kind of special.
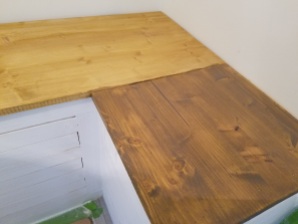
But I loved that color so I continued. I had the entire layer of Savannah Praline on and then I thought I’d try Beech Nut Gray over it. Just to see.
So I did.
Annnndddd, I loved it. It was the perfect warm but worn tone. The combo was stunning.
Now to protect it.
To seal it, I used three coats of endurance along the base (the white part) and three coats of CeCe’s Flat Matte over the stained wood for a clean finish.

I absolutely LOVE how it turned out! I can’t wait to make the pedestal table out of a pile of old walnut wood. Beautiful and functional – my favorite combo.








What is the difference between the skinny ship lap and the regular ship lap?
LikeLike